由于这个模块内容较多,分为上、中、下 三篇博客分别来讲述,请耐心阅读。
课程模块分为四个部分
- 课程列表
- 课程详情
- 视频播放
- 播放记录
课程模块(中)主要讲述课程详情部分
一、课程详情界面
1、创建课程详情界面
在com.boxuegu.activity包中创建一个Java类命名为VideoListActivity。在res/layout文件夹下创建一个布局文件,命名为activity_video_list。
2、导入界面图片 default_video_list_icon.png、vodeo_list_intro_icon.png
3、界面代码——activity_video_list.xml
<?xml version="1.0" encoding="utf-8"?>
<LinearLayout xmlns:android="http://schemas.android.com/apk/res/android"
    android:layout_width="match_parent"
    android:layout_height="match_parent"
    android:background="@android:color/white"
    android:orientation="vertical">
    <TextView
        android:layout_width="fill_parent"
        android:layout_height="200dp"
        android:background="@drawable/default_video_list_icon"/>
    <LinearLayout
        android:layout_width="fill_parent"
        android:layout_height="50dp"
        android:gravity="center"
        android:orientation="horizontal">
        <RelativeLayout
            android:layout_width="0dp"
            android:layout_height="fill_parent"
            android:layout_weight="1"
            android:background="@drawable/video_list_intro_icon">
            <TextView
                android:layout_width="fill_parent"
                android:layout_height="46dp"
                android:id="@+id/tv_intro"
                android:layout_centerVertical="true"
                android:background="#30B4FF"
                android:gravity="center"
                android:text="简 介"
                android:textColor="#FFFFFF"
                android:textSize="20sp"/>
        </RelativeLayout>
        <View
            android:layout_width="1dp"
            android:layout_height="48dp"
            android:background="#C3C3C3"/>
        <RelativeLayout
            android:layout_width="0dp"
            android:layout_height="fill_parent"
            android:layout_weight="1"
            android:background="@drawable/video_list_intro_icon">
            <TextView
                android:layout_width="fill_parent"
                android:layout_height="46dp"
                android:id="@+id/tv_video"
                android:layout_centerVertical="true"
                android:background="#FFFFFF"
                android:gravity="center"
                android:text="视 频"
                android:textColor="#000000"
                android:textSize="20sp"/>
        </RelativeLayout>
    </LinearLayout>
    <RelativeLayout
        android:layout_width="fill_parent"
        android:layout_height="fill_parent">
        <ListView
            android:layout_width="fill_parent"
            android:layout_height="fill_parent"
            android:id="@+id/lv_video_list"
            android:layout_marginLeft="15dp"
            android:layout_marginRight="15dp"
            android:divider="#E4E4E4"
            android:dividerHeight="1dp"
            android:scrollbars="none"
            android:visibility="gone"/>
        <ScrollView
            android:layout_width="fill_parent"
            android:layout_height="fill_parent"
            android:id="@+id/sv_chapter_intro">
            <LinearLayout
                android:layout_width="fill_parent"
                android:layout_height="fill_parent"
                android:orientation="horizontal">
                <TextView
                    android:layout_width="fill_parent"
                    android:layout_height="fill_parent"
                    android:id="@+id/tv_chapter_intro"
                    android:lineSpacingMultiplier="1.5"
                    android:padding="10dp"
                    android:text="wordpress简介"
                    android:textColor="@android:color/black"
                    android:textSize="14sp"/>
            </LinearLayout>
        </ScrollView>
    </RelativeLayout>

</LinearLayout>
二、课程详情界面Item
1、创建课程详情界面item
在res/layout文件夹下创建一个布局文件,命名为video_list_item。导入所需图片 course_bar_icon.png。
2、界面代码——video_list_item.xml
<?xml version="1.0" encoding="utf-8"?>
<LinearLayout xmlns:android="http://schemas.android.com/apk/res/android"
    android:orientation="horizontal"
    android:layout_width="match_parent"
    android:layout_height="wrap_content"
    android:background="@android:color/white"
    android:gravity="center_vertical"
    android:paddingBottom="15dp"
    android:paddingTop="15dp">
    <ImageView
        android:id="@+id/iv_left_icon"
        android:layout_width="25dp"
        android:layout_height="25dp"
        android:src="@drawable/course_bar_icon" />
    <TextView
        android:id="@+id/tv_video_title"
        android:layout_width="wrap_content"
        android:layout_height="fill_parent"
        android:layout_marginLeft="10dp"
        android:gravity="center_vertical"
        android:textColor="#333333"
        android:textSize="14sp"/>
</LinearLayout>
三、创建VideoBean
在com.boxuegu.bean包中创建一个VideoBean类,用来创建视频的所有属性。
package com.boxuegu.bean;

public class VideoBean {
    public int chapterId;       //章节ID
    public int videoId;			//视频ID
    public String title;		//章节标题
    public String secondTitle;	//视频标题
    public String videoPath;	//视频播放地址
}
四、课程界面Adapter
在com.boxuegu.adapter包中创建一个VideoListAdapter类。代码如下:
package com.boxuegu.adapter;

import android.content.Context;
import android.graphics.Color;
import android.view.LayoutInflater;
import android.view.View;
import android.view.ViewGroup;
import android.widget.BaseAdapter;
import android.widget.ImageView;
import android.widget.TextView;
import java.util.List;
import com.boxuegu.R;
import com.boxuegu.bean.VideoBean;

//列表
public class VideoListAdapter extends BaseAdapter{

    private Context mContext;
    private List<VideoBean> vbl;  //视频列表数据
    private int selectedPosition = -1;  //点击时选中的位置
    private OnSelectListener onSelectListener;
    public VideoListAdapter(Context context,OnSelectListener onSelectListener){
        this.mContext = context;
        this.onSelectListener = onSelectListener;
    }

    public void setSelectedPosition(int position){
        selectedPosition = position;
    }

    //设置数据更新界面
    public void setData(List<VideoBean> vbl){
        this.vbl = vbl;
        notifyDataSetChanged();
    }

    //获取Item的总数
    @Override
    public int getCount() {
        return vbl == null ? 0 : vbl.size();
    }

  //根据position得到item对应的对象
    @Override
    public VideoBean getItem(int position) {
        return vbl == null ? null : vbl.get(position);
    }

    //根据position得到item对应的ID
    @Override
    public long getItemId(int position) {
        return position;
    }

    //得到对应position的item视图
    @Override
    public View getView(final int position, View view, ViewGroup viewGroup) {
        final ViewHolder vh;
        if (view == null){
            vh = new ViewHolder();
            view = LayoutInflater.from(mContext).inflate(
                    R.layout.video_list_item,null
            );
            vh.tv_title = (TextView) view.findViewById(R.id.tv_video_title);
            vh.iv_icon = (ImageView) view.findViewById(R.id.iv_left_icon);
            view.setTag(vh);
        }else {
            vh = (ViewHolder) view.getTag();
        }
        final VideoBean bean = getItem(position);
        vh.iv_icon.setImageResource(R.drawable.course_bar_icon);
        vh.tv_title.setTextColor(Color.parseColor("#333333"));
        if (bean!=null){
            vh.tv_title.setText(bean.secondTitle);
            //设置选中效果
            if (selectedPosition == position){
                vh.iv_icon.setImageResource(R.drawable.course_intro_icon);
                vh.tv_title.setTextColor(Color.parseColor("#009958"));

            }else {
                vh.iv_icon.setImageResource(R.drawable.course_bar_icon);
                vh.tv_title.setTextColor(Color.parseColor("#333333"));
            }
        }
        view.setOnClickListener(new View.OnClickListener() {
            @Override
            public void onClick(View view) {
                if (bean == null)
                    return;
                //播放视频
                onSelectListener.onSelect(position,vh.iv_icon);
            }
        });
        return view;
    }

    class ViewHolder{
        public TextView tv_title;
        public ImageView iv_icon;
    }

    //创建接口,传递position和ImageView
    public interface OnSelectListener{
        void onSelect(int position,ImageView iv);
    }
}
五、视频列表数据的存放
1、Eclipse新建json文件,并改变文件的编码。
在assets文件夹中右键,选择new,点击file。
文件名输入data.json
由于默认的编码会导致软件运行以后中文出现乱码。在data.json文件里面,使用Alt+Enter快捷键弹出修改编码的对话框,编码方式选择UTF-8即可。
2、data.json代码如下:
[
 {
  "chapterId": 1,
  "videoId": "1",
  "title": "第1章 博客(网站)简介",
  "secondTitle": "什么是博客",
  "videoPath": "video11.mp4"
 },
 {
  "chapterId": 1,
  "videoId": "2",
  "title": "第1章 博客(网站)简介",
  "secondTitle": "网站与博客的关系",
  "videoPath": "beyond.mp4"
 },
 {
  "chapterId": 2,
  "videoId": "1",
  "title": "第2章 Linux系统简介",
  "secondTitle": "认识Linux",
  "videoPath": ""
 },
 {
  "chapterId": 2,
  "videoId": "2",
  "title": "第2章 Linux系统简介",
  "secondTitle": "CentOS 7简单操作",
  "videoPath": ""
 },
 {
  "chapterId": 3,
  "videoId": "1",
  "title": "第3章  WordPress简介",
  "secondTitle": "动态博客系统",
  "videoPath": ""
 },
 {
  "chapterId": 3,
  "videoId": "2",
  "title": "第3章 WordPress简介",
  "secondTitle": "WordPress系统",
  "videoPath": ""
 },
 {
  "chapterId": 4,
  "videoId": "1",
  "title": "第4章 安装MySQL数据库",
  "secondTitle": "MySQL数据库简介",
  "videoPath": ""
 },
 {
  "chapterId": 4,
  "videoId": "2",
  "title": "第4章 安装MySQL数据库",
  "secondTitle": "安装MySQL数据库",
  "videoPath": ""
 },
 {
  "chapterId": 5,
  "videoId": "1",
  "title": "第5章 数据存储服务器",
  "secondTitle": "常见的服务器",
  "videoPath": ""
 },
 {
  "chapterId": 5,
  "videoId": "2",
  "title": "第5章 数据存储服务器",
  "secondTitle": "Nginx的安装",
  "videoPath": ""
 },
 {
  "chapterId": 6,
  "videoId": "1",
  "title": "第6章 安装PHP环境",
  "secondTitle": "PHP语法简介",
  "videoPath": ""
 },
 {
  "chapterId": 6,
  "videoId": "2",
  "title": "第6章 安装PHP环境",
  "secondTitle": "安装PHP",
  "videoPath": ""
 },
 {
  "chapterId": 7,
  "videoId": "1",
  "title": "第7章 云服务器的购买",
  "secondTitle": "购买云服务器",
  "videoPath": ""
 },
 {
  "chapterId": 7,
  "videoId": "2",
  "title": "第7章 云服务器的购买",
  "secondTitle": "云服务器的简单配置",
  "videoPath": ""
 },
 {
  "chapterId": 8,
  "videoId": "1",
  "title": "第8章 域名购买及备案",
  "secondTitle": "购买域名",
  "videoPath": ""
 },
 {
  "chapterId": 8,
  "videoId": "2",
  "title": "第8章 域名购买及备案",
  "secondTitle": "域名备案",
  "videoPath": ""
 },
 {
  "chapterId": 9,
  "videoId": "1",
  "title": "第9章 安装WordPress",
  "secondTitle": "安装前准备",
  "videoPath": ""
 },
 {
  "chapterId": 9,
  "videoId": "2",
  "title": "第9章 安装WordPress",
  "secondTitle": "安装WordPress",
  "videoPath": ""
 },
 {
  "chapterId": 10,
  "videoId": "1",
  "title": "第10章 WordPress简单设置",
  "secondTitle": "更换博客主题",
  "videoPath": ""
 },
 {
  "chapterId": 10,
  "videoId": "2",
  "title": "第10章 WordPress简单设置",
  "secondTitle": "博客基本布局设置",
  "videoPath": ""
 }
]
六、课程详情界面逻辑代码
1、界面代码——VideoListActivity.java
package com.boxuegu.activity;

import android.content.Context;
import android.content.Intent;
import android.content.SharedPreferences;
import android.content.pm.ActivityInfo;
import android.graphics.Color;
import android.support.annotation.NonNull;
import android.support.v7.app.AppCompatActivity;
import android.os.Bundle;
import android.text.TextUtils;
import android.view.View;
import android.widget.ImageView;
import android.widget.ListView;
import android.widget.ScrollView;
import android.widget.TextView;
import android.widget.Toast;
import org.json.JSONArray;
import org.json.JSONObject;
import java.io.BufferedReader;
import java.io.IOException;
import java.io.InputStream;
import java.io.InputStreamReader;
import java.util.ArrayList;
import java.util.List;
import com.boxuegu.R;
import com.boxuegu.adapter.VideoListAdapter;
import com.boxuegu.bean.VideoBean;
import com.boxuegu.utils.AnalysisUtils;
import com.boxuegu.utils.DBUtils;

public class VideoListActivity extends AppCompatActivity implements View.OnClickListener {

    private String intro;
    private int chapterId;
    private DBUtils db;
    private ArrayList<VideoBean> videoList;
    private TextView tv_intro;
    private TextView tv_video;
    private ListView lv_video_list;
    private TextView tv_chapter_intro;
    private ScrollView sv_chapter_intro;
    private VideoListAdapter adapter;

    @Override
    protected void onCreate(Bundle savedInstanceState) {
        super.onCreate(savedInstanceState);
        setContentView(R.layout.activity_video_list);
        //设置界面为视频
        setRequestedOrientation(ActivityInfo.SCREEN_ORIENTATION_PORTRAIT);
        //从课程界面传过来的章节ID
        chapterId = getIntent().getIntExtra("id", 0);
        //从课程界面传过来的章节简介
        intro = getIntent().getStringExtra("intro");
        db = DBUtils.getInstance(VideoListActivity.this);
        initData();
        initView();

    }

    //初始化界面UI控件
    private void initView() {
        tv_intro = (TextView) findViewById(R.id.tv_intro);
        tv_video = (TextView) findViewById(R.id.tv_video);
        lv_video_list = (ListView) findViewById(R.id.lv_video_list);
        tv_chapter_intro = (TextView) findViewById(R.id.tv_chapter_intro);
        sv_chapter_intro = (ScrollView)findViewById(R.id.sv_chapter_intro);
        adapter = new VideoListAdapter(this, new VideoListAdapter.OnSelectListener() {
            @Override
            public void onSelect(int position, ImageView iv) {
                adapter.setSelectedPosition(position); //设置适配器的选中项
                VideoBean bean = videoList.get(position);
                String videoPath = bean.videoPath;
                //notifyDataSetChanged刷新UI
                adapter.notifyDataSetChanged();
                if (TextUtils.isEmpty(videoPath)){
                    Toast.makeText(VideoListActivity.this,"本地没有此视频,暂时无法播放",Toast.LENGTH_SHORT).show();
                    return;
                }else {
                    //判断用户是否登录,若登录则把视频添加到记录中
                    if (readLoginStatus()){
                        String userName = AnalysisUtils.readLoginUserName(VideoListActivity.this);
                        db.saveVideoPlayList(videoList.get(position),userName);

                    }
                    //跳转到视频播放界面

                }
            }
        });
        lv_video_list.setAdapter(adapter);
        tv_intro.setOnClickListener(this);
        tv_video.setOnClickListener(this);
        adapter.setData(videoList);
        tv_chapter_intro.setText(intro);
        tv_intro.setBackgroundColor(Color.parseColor("#30B4FF"));
        tv_video.setBackgroundColor(Color.parseColor("#FFFFFF"));
        tv_intro.setTextColor(Color.parseColor("#FFFFFF"));
        tv_video.setTextColor(Color.parseColor("#000000"));


    }
    /**
     * 设置视频列表本地数据
     */
    private void initData() {
        //多个视频,用jsonArray
        JSONArray jsonArray;
        InputStream is = null;
        try {
            is = getResources().getAssets().open("data.json");
            jsonArray = new JSONArray(read(is));
            videoList = new ArrayList<VideoBean>();
            for (int i = 0;i < jsonArray.length();i++){
                VideoBean bean = new VideoBean();
                JSONObject jsonObj = jsonArray.getJSONObject(i);
                if(jsonObj.getInt("chapterId") == chapterId){
                    bean.chapterId = jsonObj.getInt("chapterId");
                    bean.videoId = Integer.parseInt(jsonObj.getString("videoId"));
                    bean.title = jsonObj.getString("title");
                    bean.secondTitle = jsonObj.getString("secondTitle");
                    bean.videoPath = jsonObj.getString("videoPath");
                    videoList.add(bean);
                }
                bean = null;
            }

        } catch (Exception e) {
            e.printStackTrace();
        }

    }
/*
    *读取数据流,参数in就是数据流,把输入流转换成字符串
     */

    private String read(InputStream in) {
        BufferedReader reader = null;
        StringBuilder sb = null;
        String line = null;
        try {
            sb = new StringBuilder(); //实例化一个StringBulider对象
            //InoutStreamReader把in字节流转换成字符流
            reader = new BufferedReader(new InputStreamReader(in));
            while ((line = reader.readLine()) != null) {
                sb.append(line);
                sb.append("\n");
            }
        } catch (IOException e) {
            e.printStackTrace();
            return "";
        } finally {
            if (in != null) {
                try {
                    in.close();
                } catch (IOException e) {
                    e.printStackTrace();
                }
            }
            if (reader != null) {
                try {
                    reader.close();
                } catch (IOException e) {
                    e.printStackTrace();
                }
            }
        }
        return sb.toString();
    }

    /**
     * 从SharedPreferences读取登录状态
     */

    private boolean readLoginStatus() {
        SharedPreferences sp = getSharedPreferences("loginInfo", Context.MODE_PRIVATE);
        boolean isLogin = sp.getBoolean("isLogin",false);
        return isLogin;
    }

    @Override
    protected void onActivityResult(int requestCode, int resultCode, Intent data) {
        super.onActivityResult(requestCode, resultCode, data);
        if (data!=null){
            //
            int position = data.getIntExtra("position",0);
            adapter.setSelectedPosition(position);
            //
            lv_video_list.setVisibility(View.VISIBLE);
            sv_chapter_intro.setVisibility(View.GONE);
            tv_intro.setBackgroundColor(Color.parseColor("#FFFFFF"));
            tv_video.setBackgroundColor(Color.parseColor("#30B4FF"));
            tv_intro.setTextColor(Color.parseColor("#000000"));
            tv_video.setTextColor(Color.parseColor("#FFFFFF"));

        }
    }

    @Override
    public void onClick(View view) {
        switch (view.getId()){
            case R.id.tv_intro:  //简介
                lv_video_list.setVisibility(View.GONE);
                sv_chapter_intro.setVisibility(View.VISIBLE);
                tv_intro.setBackgroundColor(Color.parseColor("#30B4FF"));
                tv_video.setBackgroundColor(Color.parseColor("#FFFFFF"));
                tv_intro.setTextColor(Color.parseColor("#FFFFFF"));
                tv_video.setTextColor(Color.parseColor("#000000"));
                break;
            case R.id.tv_video:  //视频
                lv_video_list.setVisibility(View.VISIBLE);
                sv_chapter_intro.setVisibility(View.GONE);
                tv_intro.setBackgroundColor(Color.parseColor("#FFFFFF"));
                tv_intro.setTextColor(Color.parseColor("#000000"));
                tv_video.setBackgroundColor(Color.parseColor("#30B4FF"));
                tv_video.setTextColor(Color.parseColor("#FFFFFF"));
                break;
            default:
                break;
        }
    }
}
2、修改代码
(1)、找到SQLiteHelper.java文件,在 public static final String U_USERINFO = "userinfo"; 下方添加如下代码:
public static final String U_VIDEO_PLAY_LIST = "videoplaylist"; //视频播放列表
(2)、找到SQLiteHelper.java文件,在onCreate()方法里面添加如下代码:
//创建视频播放记录
        db.execSQL("CREATE TABLE IF NOT EXISTS " + U_VIDEO_PLAY_LIST + "( " +
                "_id INTEGER PRIMARY KEY AUTOINCREMENT, "
                + "userName VARCHAR,"//用户名
                + "chapterId INT," //章节id
                + "videoId INT,"//小节id
                + "videoPath VARCHAR,"
                + "title VARCHAR,"  //章节名字
                + "secondTitle VARCHAR" // 视频名字
                + ")");
(3)、找到SQLiteHelper.java文件,在onUpgrade()方法里面的onCreate(db);语句前添加如下代码:
db.execSQL("DROP TABLE IF NOT EXISTS " + U_VIDEO_PLAY_LIST);
(4)、找到DBUtils.java文件,添加如下代码:
 //保存视频播放记录
    public void saveVideoPlayList(VideoBean bean, String userName) {
        //判断如果里面已经有此记录则需要先删除再重新存放
        if (hasVideoPlay(bean.chapterId, bean.videoId, userName)) {
            boolean isDelete = delVideoPlay(bean.chapterId, bean.videoId, userName);
            if (!isDelete) {
                //没有删除成功
                return;
            }
        }
        ContentValues cv = new ContentValues();
        cv.put("userName", userName);
        cv.put("chapterId", bean.chapterId);
        cv.put("videoId", bean.videoId);
        cv.put("videoPath", bean.videoPath);
        cv.put("title", bean.title);
        cv.put("secondTitle", bean.secondTitle);
        db.insert(SQLiteHelper.U_VIDEO_PLAY_LIST, null, cv);

    }

    /**
     * 删除已经存在的是视屏记录
     * @param chapterId
     * @param videoId
     * @param userName
     * @return
     */

    public boolean delVideoPlay(int chapterId, int videoId, String userName) {
        boolean delSuccess = false;
        int row = db.delete(SQLiteHelper.U_VIDEO_PLAY_LIST, " chapterId=? AND videoId=? AND userName=?",
                new String[]{chapterId + "", videoId + "", userName});
        if (row > 0) {
            delSuccess = true;
        }

        return delSuccess;
    }
    /**
     * 判断视频记录是否存在
     * @param chapterId
     * @param videoId
     * @param userName
     * @return
     */
    public boolean hasVideoPlay(int chapterId, int videoId, String userName) {
        boolean hasVideo = false;
        String sql = "SELECT * FROM " + SQLiteHelper.U_VIDEO_PLAY_LIST + " WHERE chapterId=? AND videoId=? AND userName =?";
        Cursor cursor = db.rawQuery(sql, new String[]{ chapterId + "", videoId + "", userName});
        if (cursor.moveToFirst()) {
            hasVideo = true;
        }
        cursor.close();
        return hasVideo;
    }
(5)、找到CourseAdapter.java文件,在两处注释//跳转到课程详情界面分别添加以下代码:
 Intent intent = new Intent(mContext, VideoListActivity.class);
intent.putExtra("id",bean.id);
intent.putExtra("intro",bean.intro);
mContext.startActivity(intent);
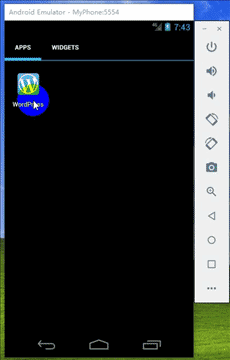
七、运行效果
Android项目实战系列—基于博学谷 开源地址